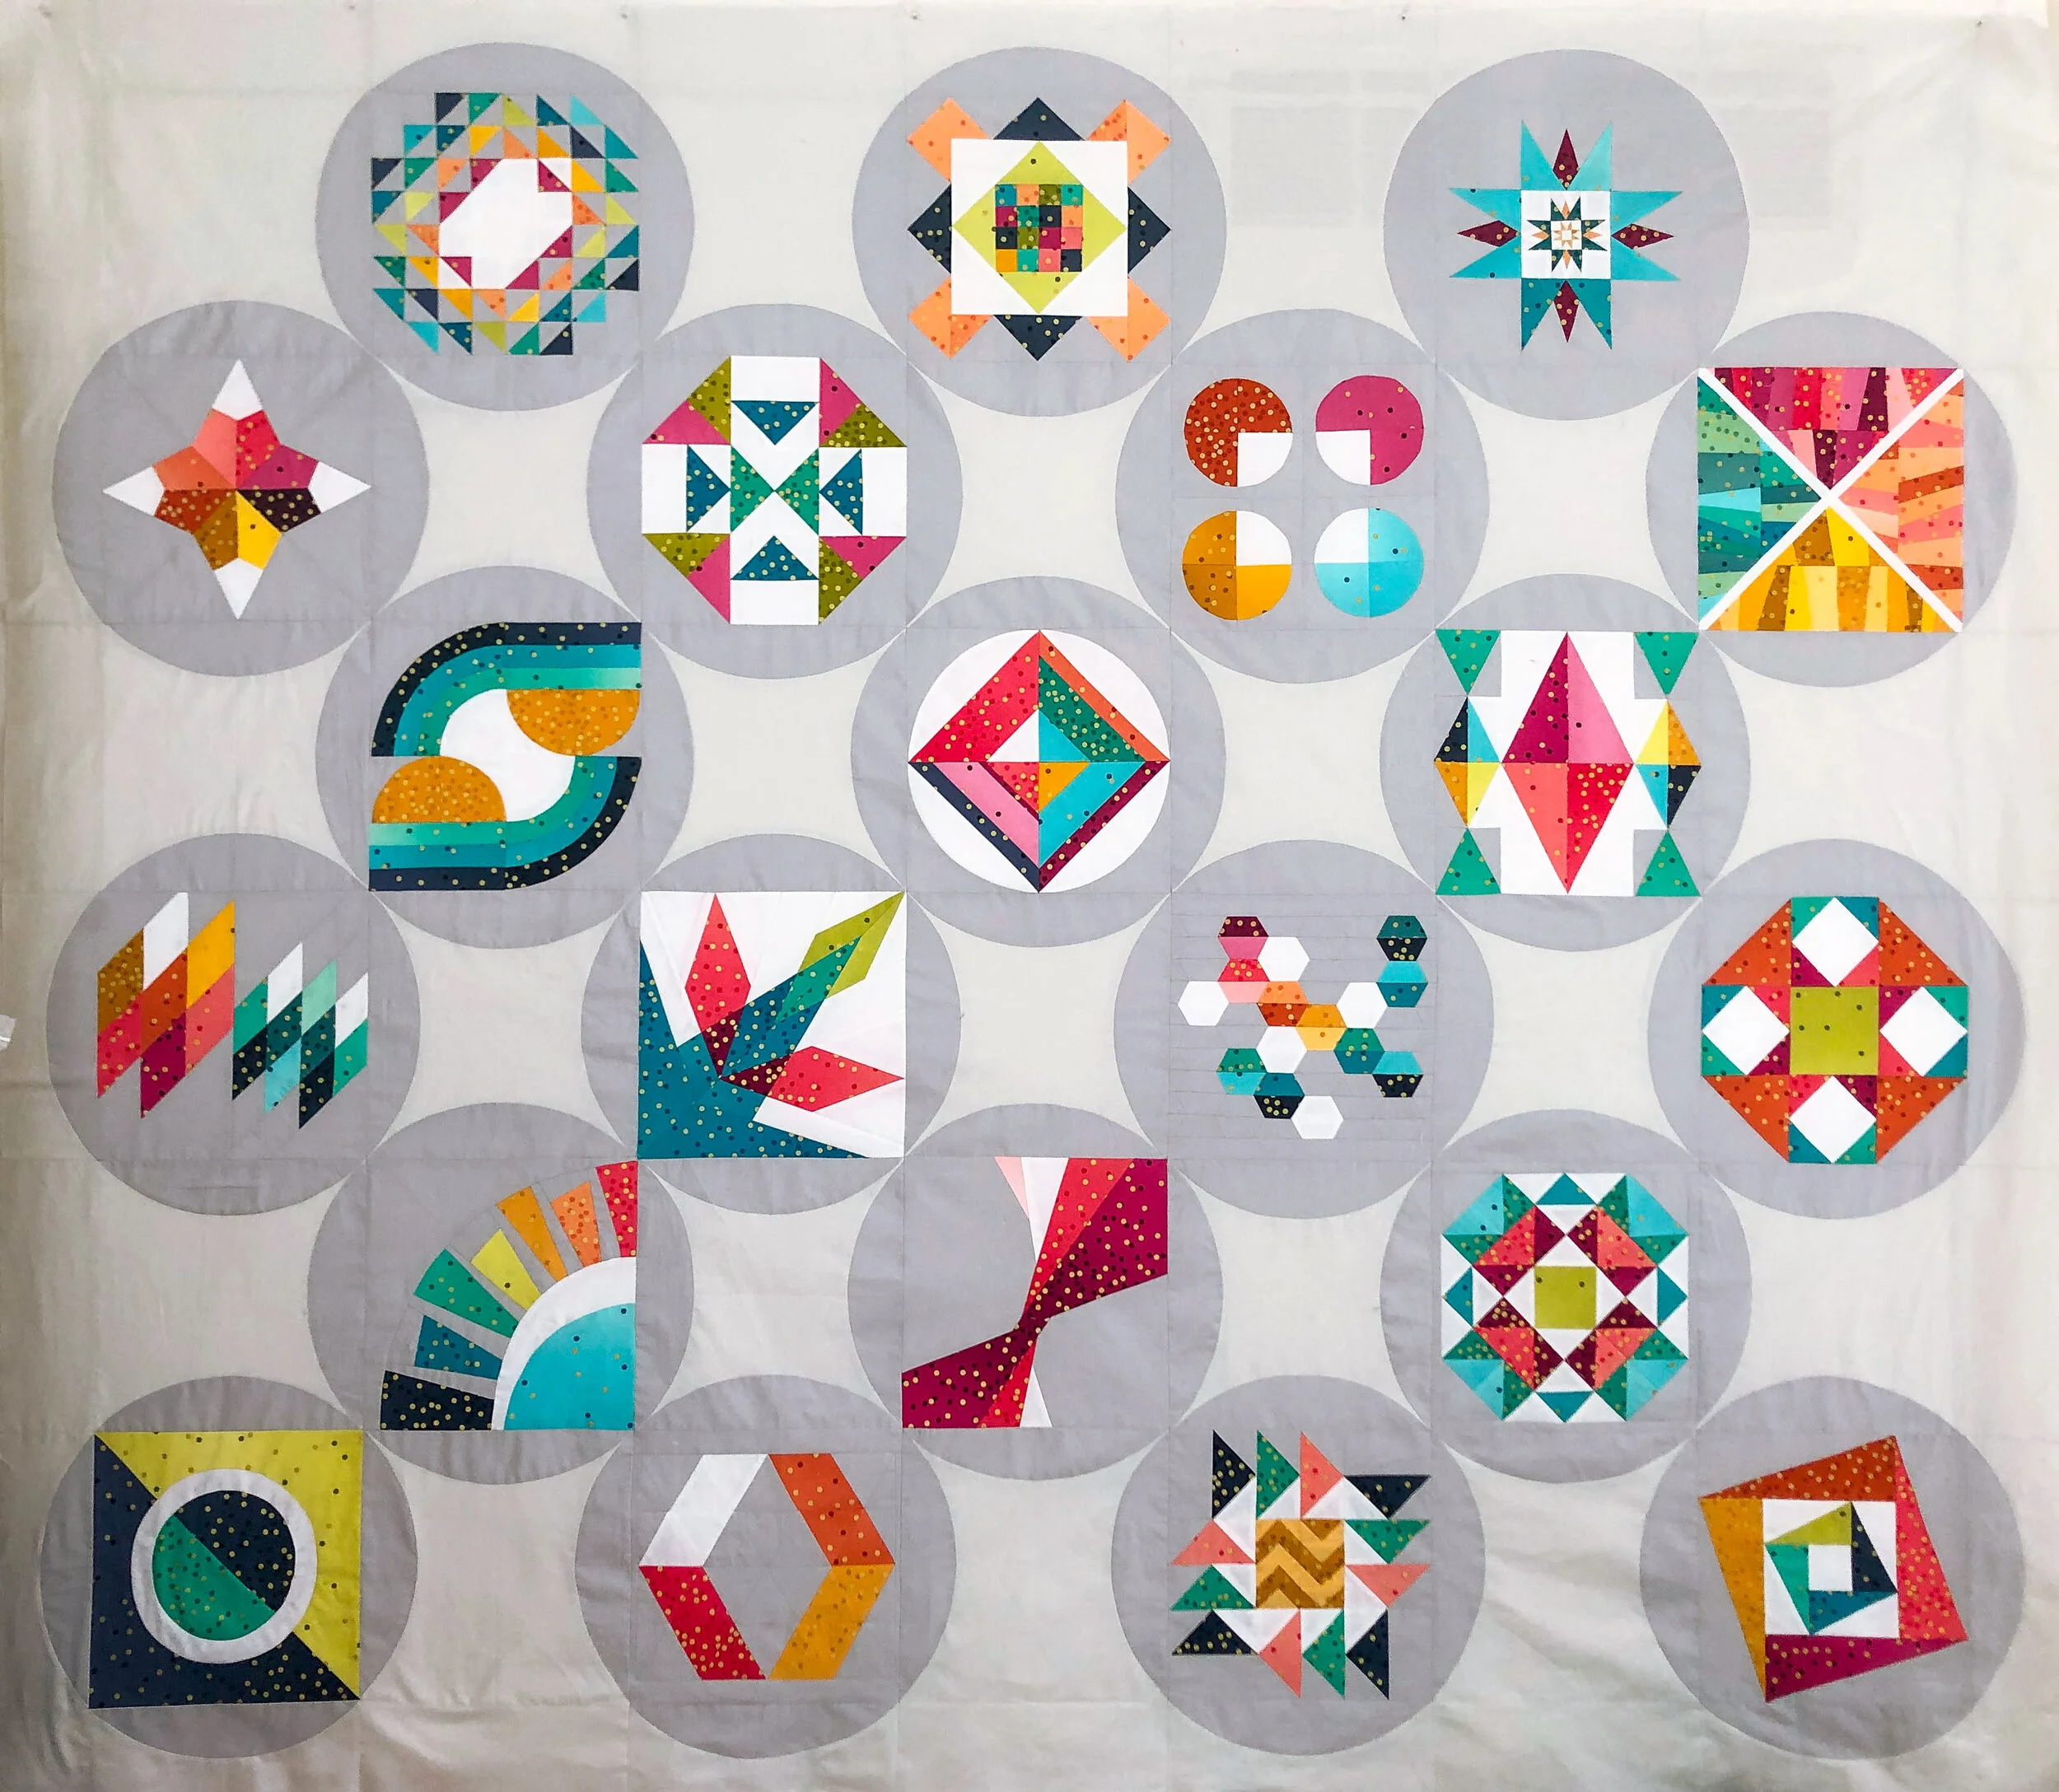
Summer Sampler 2019: Piecing Bootcamp - a completed top
Yessss!! I finished my Summer Sampler 2019 quilt top! Cue the confetti cannons and loud obnoxious music!
Okay, but seriously, you guys. This year marks the fourth Summer Sampler quilt-along that Katie, Faith, and I have created (well, make that the fifth, if you count the original Summer Sampler way back in 2011). After spending the summer making all these gorgeous weekly sampler blocks, actually putting them together and finishing the quilt always feels like a HUGE accomplishment. Even for us—the organizers/designers—it feels huge! So for all of you out there who are still working on this quilt, keep plugging away. You can do it! And I hope you when you do finish this bad boy, you'll feel the same as me: "Hey, look, I DID A THING!"
Anyway, let's talk about this circle-block setting for a minute (this was one of two setting options that we sent out at the end of the quilt-along). I know there are a lot of you out there working on this setting. So you should know that in the almost 12 years I've been quilting (wait, what? How did that happen??), this setting is somehow both the hardest thing I've ever worked on, AND the most forgiving. Weird but true.
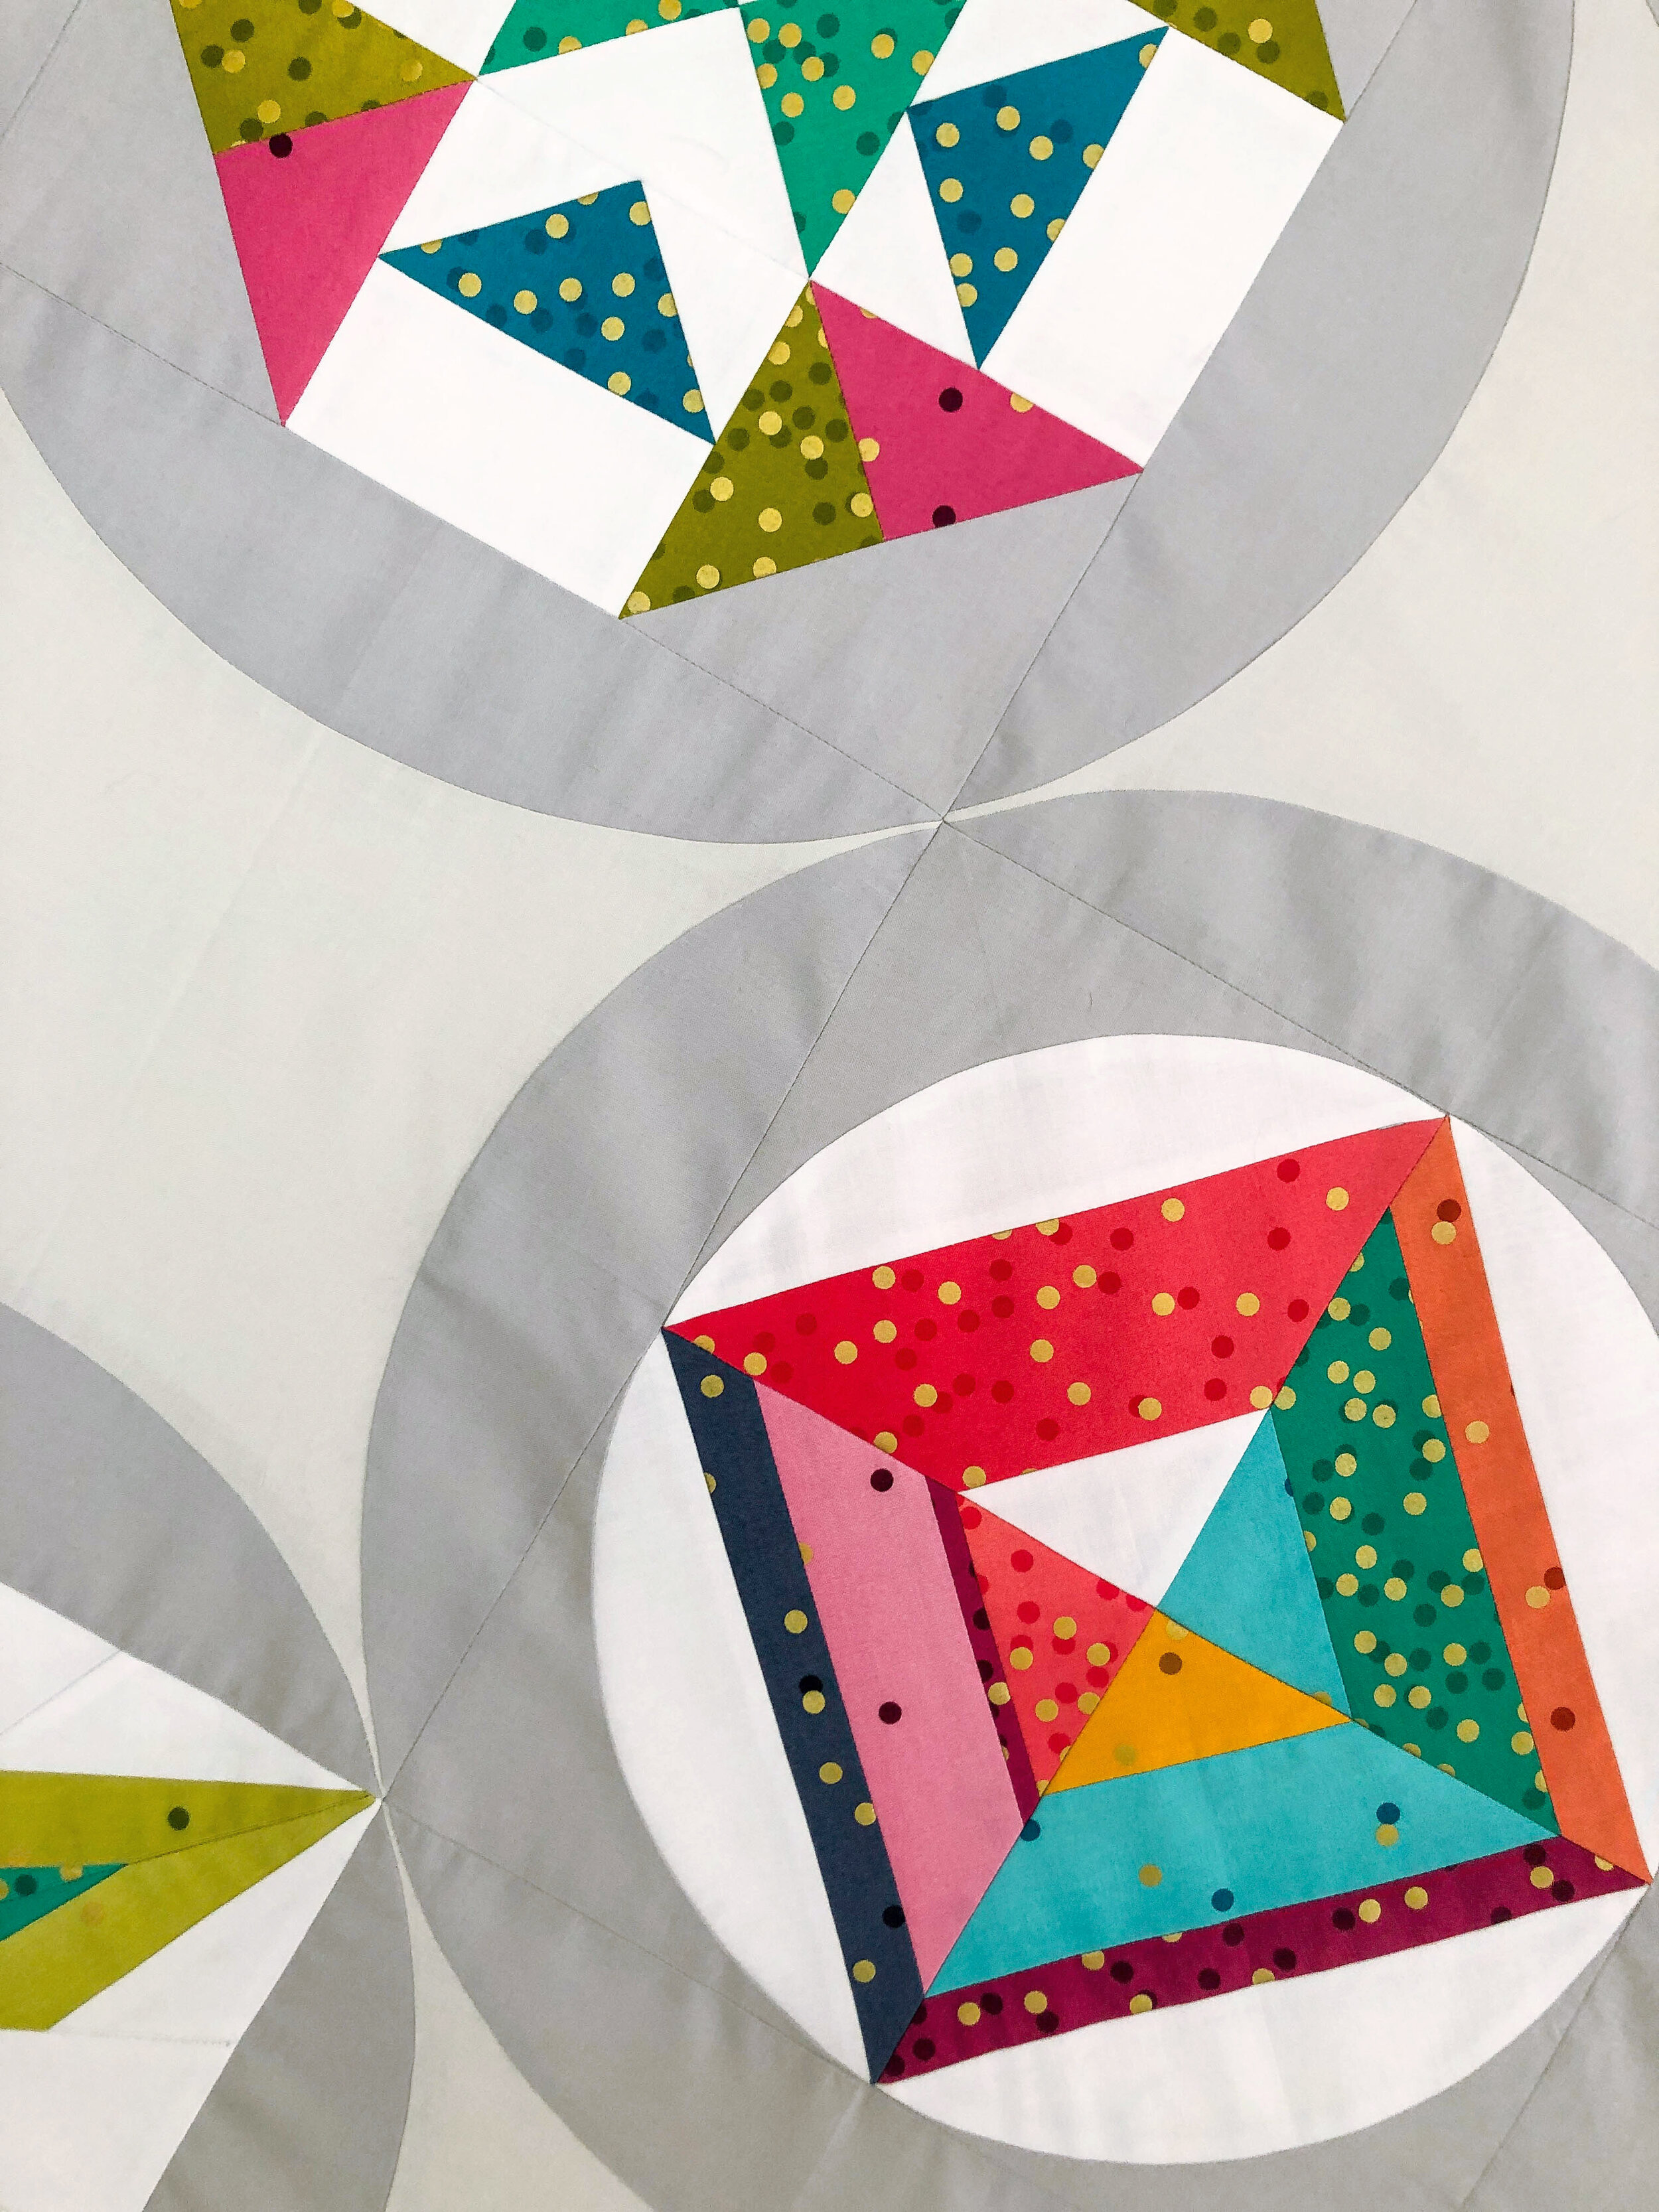
To show you what I mean, let's look at one of the spots in my quilt where my seams really didn't come together the way they're supposed to:
Yeah. Not my finest work, you guys. LOL. Those seams are obviously not meeting where they should. Why? Hard to say. Inaccurate cutting? Lackluster sewing? Maybe both? LOL. Regardless of the reason, this is what I ended up with. But now let's take a few steps back and look again at the entire quilt (with problem area circled in blue):
See what I mean about this design being forgiving? I don't know if the eye just wants to fill in those circle shapes or what, but the errors really do just kind of melt away! And I'll take that! So, if you're still contemplating which setting to do for your Summer Sampler 2019 quilt, don't be intimidated by the circle setting. Remember, this is Piecing Bootcamp! ☺️
I do, however, have a few tips:
• The templates for the curved setting blocks are too large to fit on a single sheet of 8.5" x 11" paper. There are two options in the pattern for dealing with this—I opted to print my templates at home in partial sections on 8.5" x 11" sheets of paper, which I taped together. Then I attached the printouts to template plastic to make it easier to reuse them over and over. Here is the template plastic I used. The plastic was easy to cut with both rotary cutter and scissors when I intended to cut it, but resistant to cutting when I didn't intend to (i.e., when I was cutting around the edges of the template). I actually sandwiched my paper templates between two layers of plastic to make them even sturdier, attaching it all with double-sided tape. The two layers also helped with the fact that the largest sheets of template plastic I could find were only 12" x 18" ... 1" too short on one side for the largest template, which is 13" square. I remedied that by making sure to switch the side where the plastic came up short when I did the second layer. That way there was at least one layer of plastic everywhere on the template (and this only affected an inch on two sides).
• Correct squaring up of the curved blocks is key! If you haven't invested in a good 12-1/2" squaring up ruler, now is definitely the time. My favorite square-up ruler by far is this one by Creative Grids. Not only does it have the extra-grabby textured spots that all the Creative Grids rulers have, it also has the absolute BEST markings for squaring up! This ruler makes squaring up those blocks so crazy easy. Yes, Creative Grids rulers are an investment, but a 12-1/2" square is definitely one of the sizes you will use the most in your ruler arsenal, so if you don't have one, get one before you tackle these blocks. ☺️
Me (and my dog Willow) want to thank everyone who quilted along with us this summer! I hope you had a fun and rewarding learning experience!Still thinking about making a Summer Sampler quilt? There is no better way to up your piecing game! Every block in Summer Sampler 2019: Piecing Bootcamp will teach you a new piecing skill. While the quilt-along is technically finished, there are still hundreds of people working on theirs, and a great Facebook community to help you on your journey! Click here to join us today!
The Summer Sampler 2019: Piecing Bootcamp includes:
• Fully-tested instructions for 21 gorgeous blocks (12" finished size)
• Complete finishing instructions to make an 80" x 92" sampler quilt
• Instructions for two layout options—you get both! No need to choose!
• All fabric requirements and suggested Moda Bella Solids colors (YES! There are fabric kits available from Sewtopia and Canadian shop Mad About Patchwork)
• Quilt mock-up coloring sheet for planning
• Access to an exclusive subscriber-only Facebook group to ask questions, get advice, and interact with the designers and a community of other quilters
Fabric used in this quilt:
Confetti Metallic Ombré collection by V and Co. (Moda)
Kona Cotton in Ultra White (Robert Kaufman)
Kona Cotton in Shadow (Robert Kaufman)
Kona Cotton in Haze (Robert Kaufman)
The Summer Sampler 2019 designers are: Top to Bottom, Left to Right
Row 1: Heather Black @Quiltachusetts, Krista Hennebury @poppyprint, Lynne Goldsworthy @lilysquilts, Lee Heinrich @lee.a.heinrich, Krystina Hopkins @khquilts
Row 2: Andrea Tsang Jackson @3rdstoryworkshop, Jemima Flendt @tiedwitharibbon, Faith Jones @freshlemonsquilts, Kitty Wilkin @nightquilter, Yvonne Fuchs @quiltingjetgirl
Row 3: Lynn Carson Harris @lynncarsonharris, Stephanie Zacharer Ruyle @spontaneousthreads
Row 4: Jen Carlton Bailly @bettycrockerass, Amy Friend @duringquiettime, Justin Stafford @keatonquilts, Katie Blakesley @swimbikequilt, Jo Avery @mybearpaw


