Christmas Ornament mini quilt
Looking for an easy, quick, modern project this holiday season? This Ornament Mini-Quilt uses the 8-at-a-time method for making half-square triangles quickly and easily—plus simple appliqué allows you to avoid curved piecing entirely!
Materials to make a Holiday Ornament Mini-quilt
• 16 solid-color squares 6″ x 6″ (I used fun holiday brights)
• 1 silver metallic or gray piece 2-3/4″ x 4″ (not shown in the photo above because I didn’t think of adding it until later!)
• 1 solid white piece about 21″ x 21″ for background
• 1 piece for quilt back, about 21″ x 21″
• 1 piece of batting about 21″ x 21″
• 3 strips for binding, 2-1/2″ x width of fabric
• a 14” - 16” circular plate, tray, or other object to trace the ornament shape
Mark diagonal lines on the back of 8 of the 6″ squares, from corner to corner in each direction.
Pair each marked square with a different color unmarked 6″ square, right sides together. Stitch along each side of both unmarked lines, 1/4″ from the line.
When you’re done, it should look like this.
Cut the stitched squares in half, straight through the intersection of the marked lines.
Without moving the square, cut the stitched squares in half again, in the other direction.
Now cut along the marked diagonal lines in both directions.
Ta-da! You now have 8 half-square triangles (HSTs)!
Press the HSTs open and trim to 2-1/2″ square. (This tiny 2-1/2″ square ruler is perfect for this task!)
Repeat this process with the other 6″ square to make 64 HSTs.
Now for the best part! Lay out the HSTs, 8 across by 8 down. There are tons of options for your layout here—you can lay out the HSTs with all the seams going in the same direction, like I did, or in zig-zagging directions, diamonds, etc. With a little advance planning, you could even make an ornament with zig-zag stripes or some other cool pattern.
With your layout complete, sew the HSTs together into groups of four, as I’ve started doing in this photo. I like to press all my seams open, but if you prefer side-pressed seams, just make sure to alternate the direction of the seams for each group of four.
Sew together the blocks of four into one large 16-1/2″ square block.
Here’s where things might get a little scary. You’re going to draw a large circle on your 16″ block and cut out the circle. To trace my circle, I used this 16″ round drink-serving tray. But any large plate, platter, or tray between 14″ and 16″ diameter would work.
Just trace around the tray or plate to create the circle.
And cut!
Does it look like a Christmas ornament yet?
Take your 21″ square background fabric piece and press it in half in both directions to crease it. This will help you find the center when placing your ornament. Leave space at the top for the little silver cap on your ornament!
To make things easier and quicker, I used my adhesive quilt basting spray to baste the mini quilt and attach the ornament pieces, all at the same time. Just slip the edge of the silver ornament cap underneath the ornament ball as you spray and attach. (I use 505 brand spray.) Combining these steps also means that your applique stitches will do double-duty as quilting stitches!
Appliqué the ornament pieces as desired (if you’re appliquéing after basting the quilt like I did, be sure to use your dual-feed or walking foot). I used raw-edge appliqué and straight-stitched around the edge of the pieces, 1/8″ from the raw edge. While using my Patchwork foot #97D foot on my B 770, I could use the line just to the left of the needle to keep my seam at 1/8″. (With raw-edge appliqué, you will get a bit of fraying around the edge, especially where you cut the circle on the bias. I don’t mind the look, especially for a mini-quilt which won’t be washed or heavily used, but if you don’t want any fraying you may want to choose a different appliqué method.)
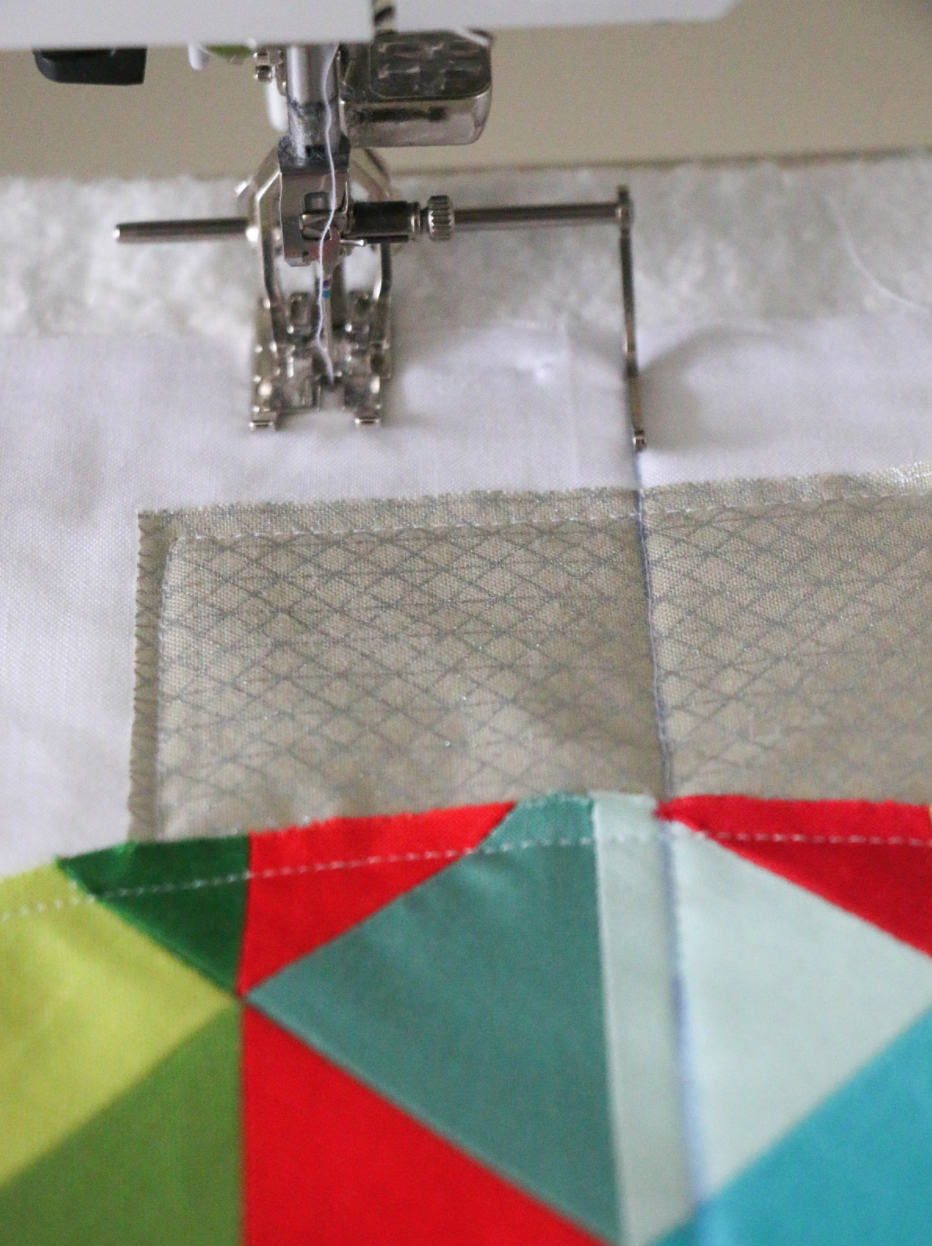
I quilted my ornament quilt with straight lines that followed the seams of the HSTs. In order to keep the lines straight past the edges of the round ornament, I marked one line in the middle, then used the guide bar on my dual-feed foot to quilt the remaining lines.
Like so.
And there you have it: A simple, fun little project that will add to your holiday decor this season.
Enjoy, and happy holidays!


