Never tear out stitches again! My favorite paper-piecing tip
So, about a year ago, as I was getting ready to teach Advanced Piecing at QuiltCon, I had kind of an amazing realization. It was the kind of realization that cues angels singing and brilliant rays of sunlight. I mean, it really was that good. I think I discovered a way to make paper-piecing kind of sort of foolproof. Sound too good to be true? Not to oversell this or anything, but I ran my little tip past my students in class, and they loved it—one person called it "mind-blowing" and another said this little tip alone was worth the price of the class.
Curious? 😂 Read on, or click here to watch my video demo of this tip!
Disclaimer: I'm sure I'm not the first person to have discovered this, so I don't claim to be the inventor of this technique. But I personally have not seen it described elsewhere.
For the purposes of this post, let’s say you’re making this unit (which is part of a traditional Wheel of Fortune block).
Here’s what the partially-sewn unit looks like from the back.
Now let’s say you’ve already pieced the first three pieces in your four-piece unit (as shown above). So far, so good!
But check out that where that next little piece needs to go. You’ve got a tricky angle, and the area you need to cover is offset. That’s a bad combination in paper-piecing! Nine times out of ten, beginners will place that next piece wrong, and as a result, when the piece is sewn, they’ll flip it into place and find that they “missed” the tip of the triangle. That means tearing out stitches (which is never fun, but it’s really not fun when you’re paper piecing), and making another blind attempt to place the piece correctly (and maybe another, and another …). This is a prime example of the kind of seam that makes people tear their hair out and swear off paper-piecing FOREVER.
But guess what? I have an insanely easy way to avoid all of that. Get ready to love paper-piecing again! (Or maybe for the first time.)
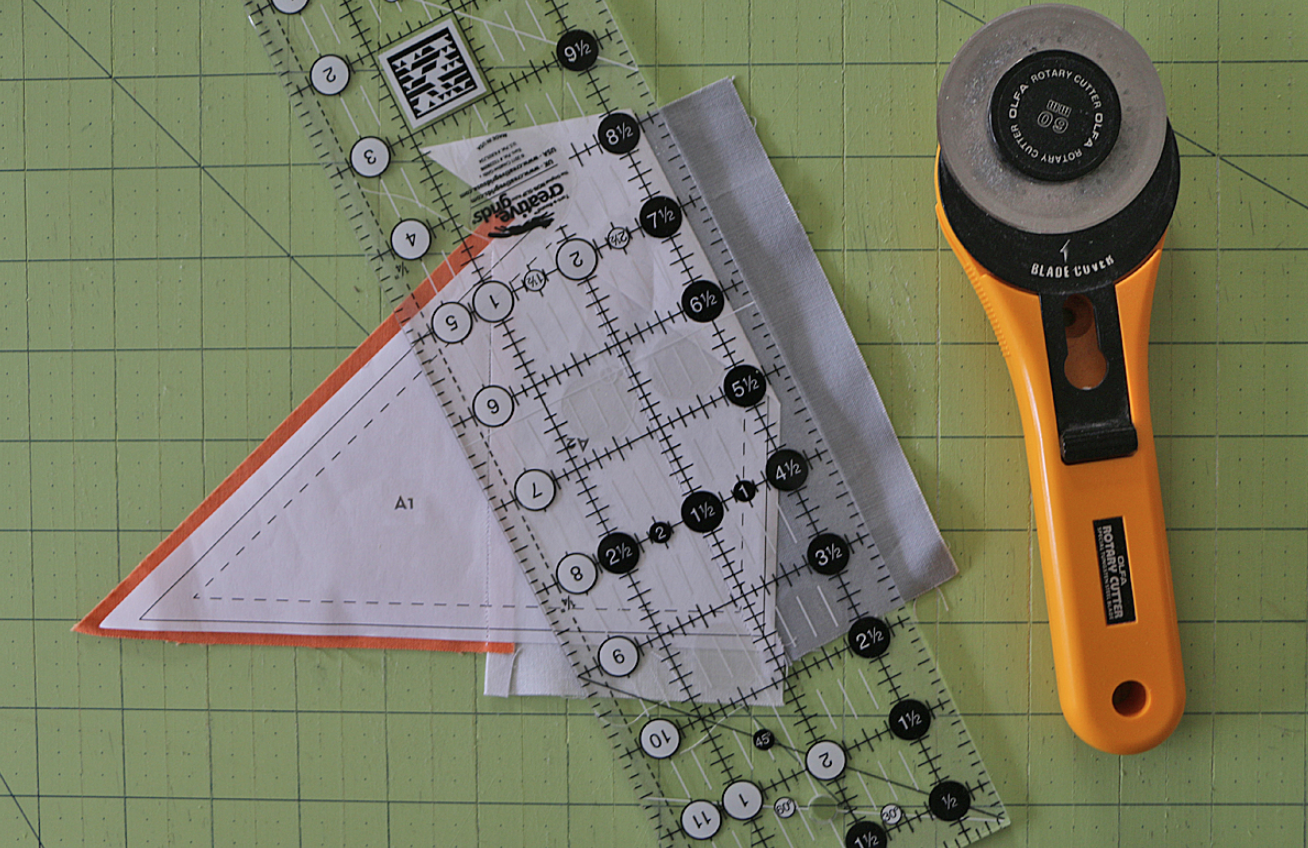
First, fold back the paper template along the line you’re about to sew. (In this case, it’s the line between A3 and A4.)
Next, trim off any excess fabric from piece number 3, a quarter-inch away from the fold of the paper template, as shown above. (By the way, if you have trouble with paper-piecing, folding back the paper and trimming the excess fabric is always helpful, no matter what kind of angle you’re dealing with. It gives you a better visual reference point for placing the next piece.)
Now you should have a unit that looks like this.
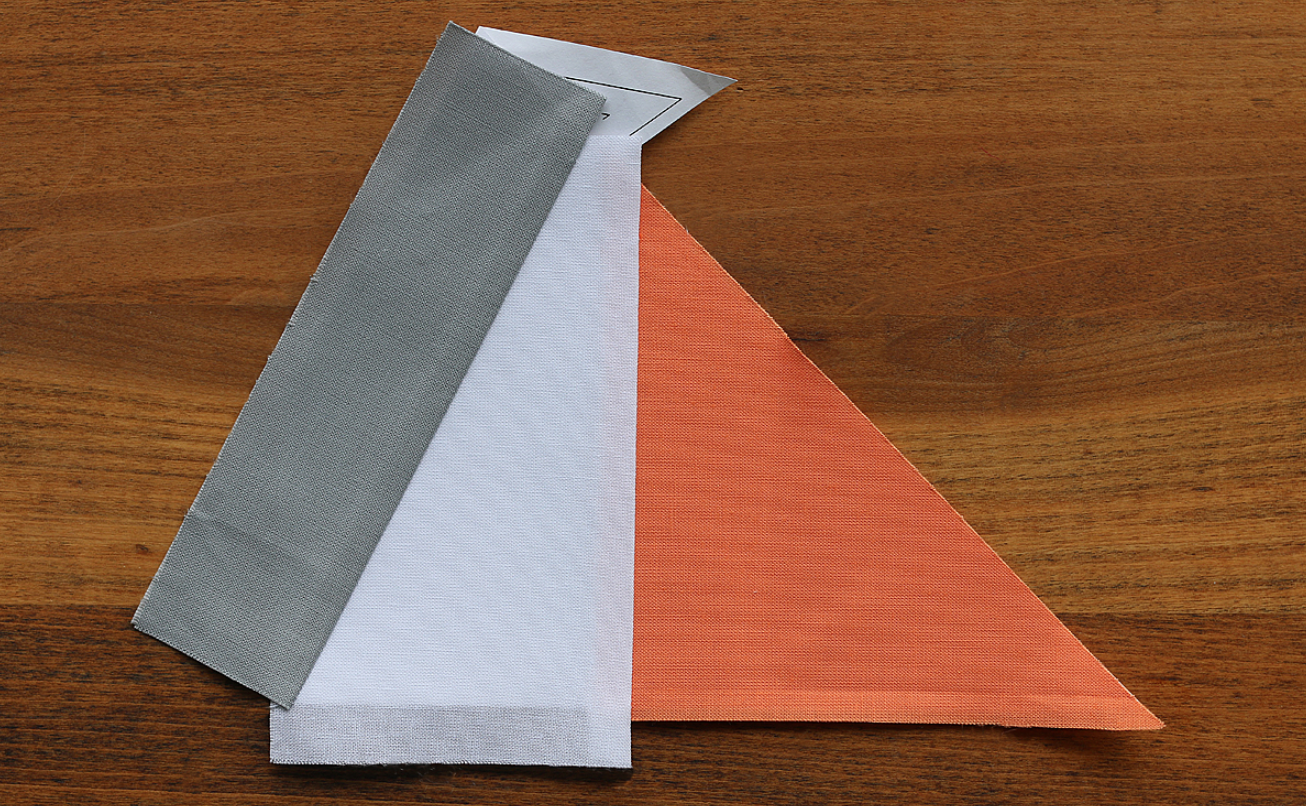
Next, flip the unit over—this photo shows it from the other side. See that part of the folded paper template that’s sticking out at the top? That’s the key to this next step.
Now you’re ready to place your fourth and final piece. And here’s where the magic happens. If you place your next piece so that it covers the folded paper template where it’s sticking out from behind the unit, it will be in the correct place. Every time.
It’s true! So, see the photo above? That’s wrong. The white fabric piece is not placed so that it covers up that little bit of paper template you can see sticking out from behind, at the top of the unit.
And here’s the piece placed correctly. I’ve moved it up so that it covers that little bit of paper template that was showing in the previous picture. You don’t have to worry about anything else—just whether the part of the template that sticks out is covered. And you’ll be good.
Here’s what it looks like when placed correctly from the other side.
Before you sew, you need to unfold the folded paper. Flatten out your paper template without moving the piece you just placed.
Now just sew on the line as usual.
Here’s what it looks like when sewn into place, in the correct spot. No missed corners!
Finally, here’s our completed unit, all neatly trimmed and ready to go.
And just in case you’re curious about the block that this unit makes, here is the completed block. You can find the instructions to make this block and the paper-piecing templates in my book, Vintage Quilt Revival: 22 Modern Designs From Classic Blocks, available from Interweave Press.
That’s it! You’ve just learned something that will make all your paper-piecing endeavors much easier. This trick works any time you fold the paper template over and have some part of it sticking out.
I look forward to seeing all of you paper-piecing all the things! Enjoy!


